Categories
How-to

How to do mulching

A layer of dry leaves covers the soil around ginger plants

Mulching is a simple and yet useful gardening technique. It is the practice of putting a layer of covering above the surface of soil, so that the soil is shielded and protected. The layer of covering is known as mulch. Mulch helps to conserve moisture in soil and suppress weeds. It also maintains the soil’s structure and regulates its temperature. Organic mulches enrich soil with nutrients and support soil microorganisms. Mulch can also help avoid direct contact of edible crops with soil. It is used for decorative purposes as well.

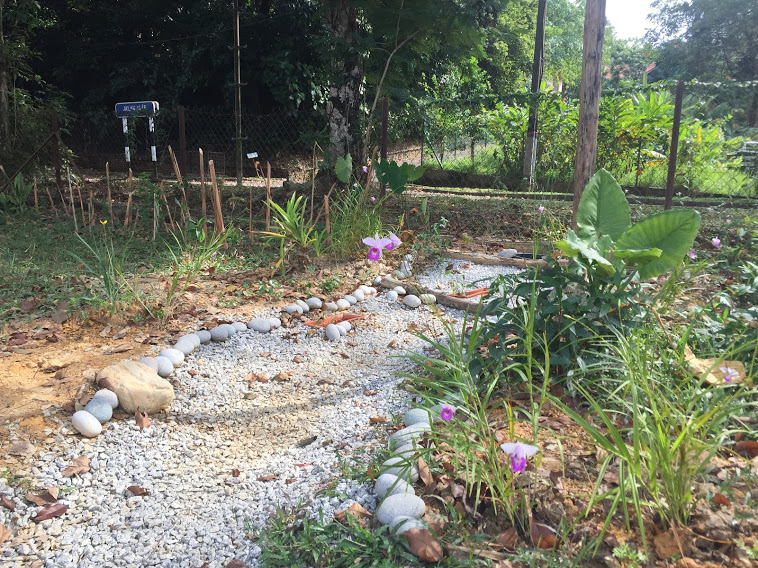
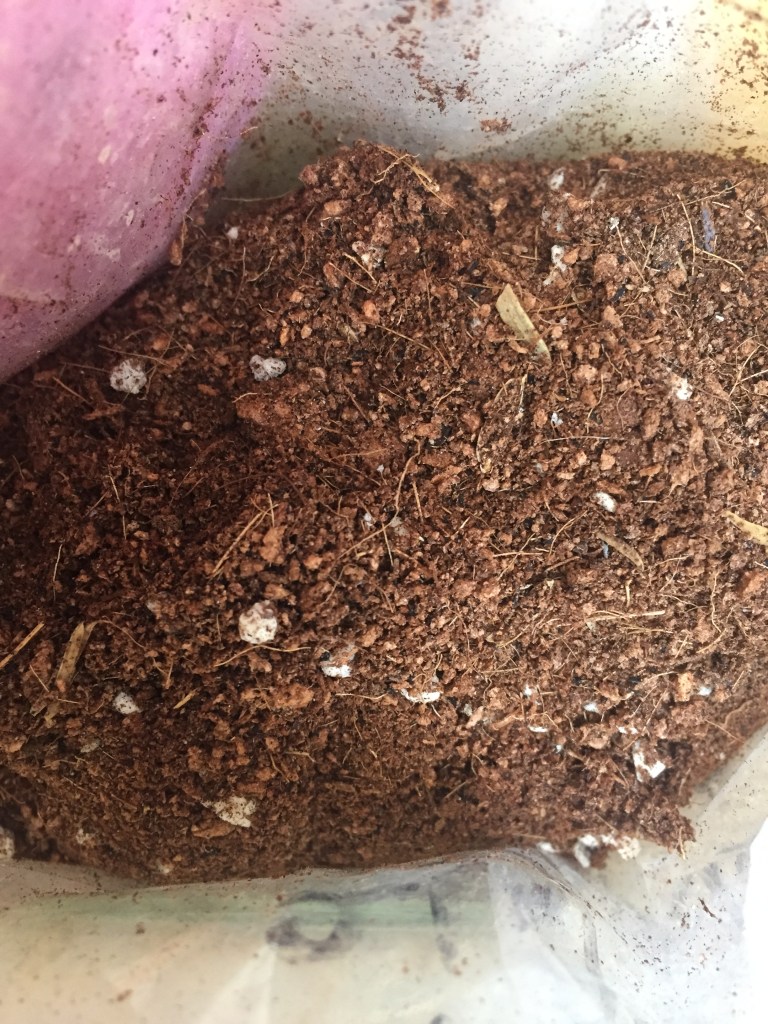
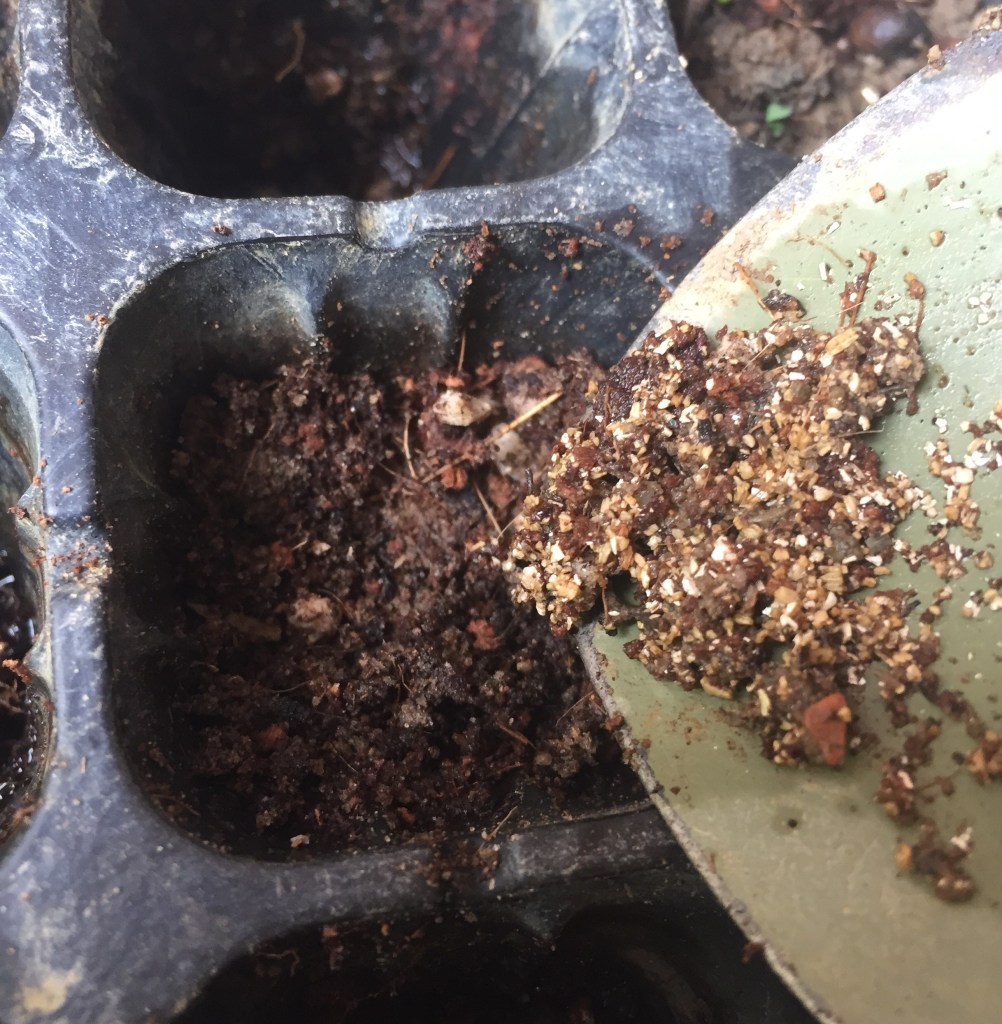
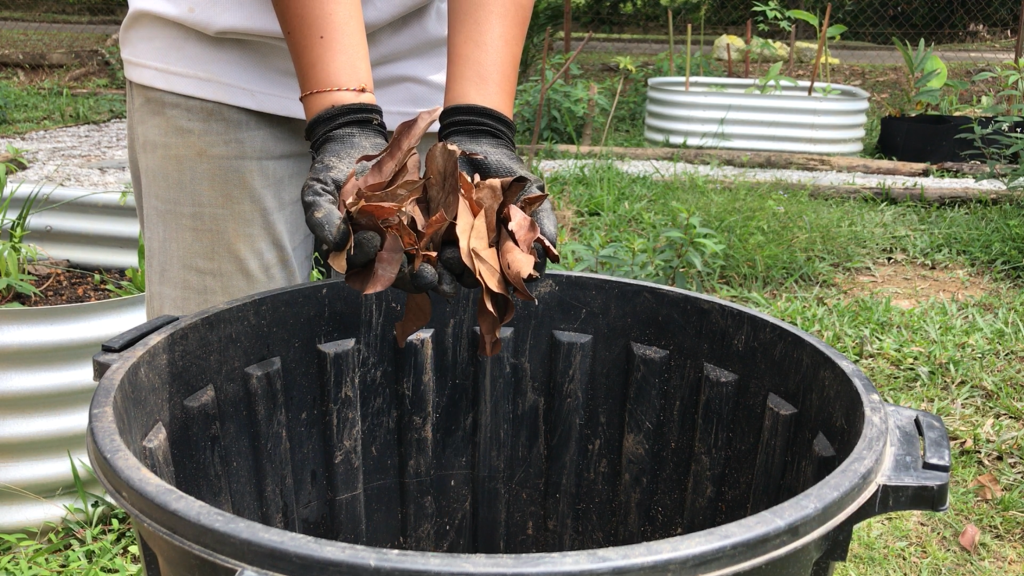
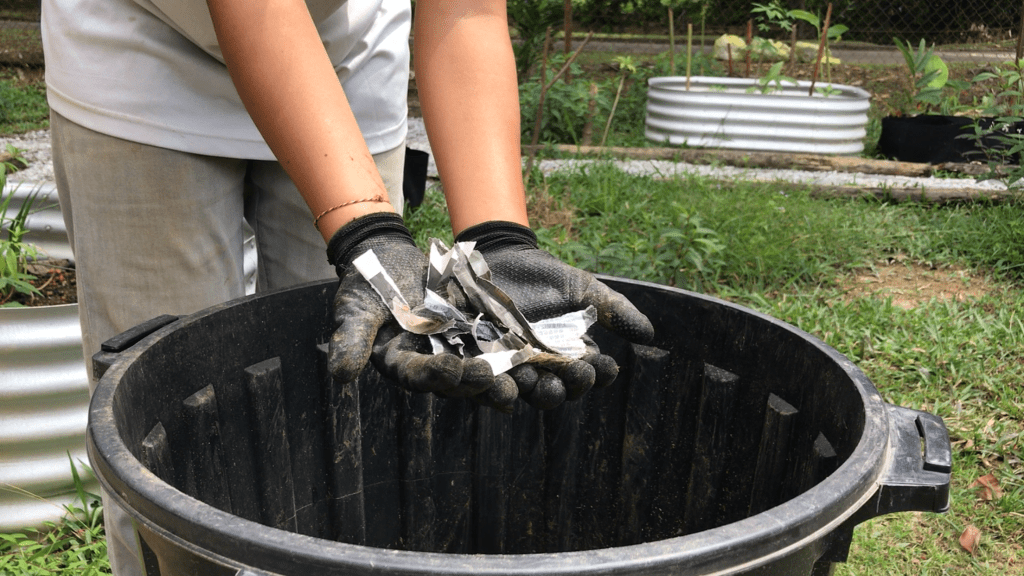
There are two types of mulch: organic and inorganic. Organic mulches are made up of formerly living materials. They will eventually decompose and need to be replaced regularly. However, organic mulches will improve structure and organic content of soil underneath. Some examples of organic mulches are wood chippings, shredded leaves and newspaper sheets. Inorganic mulches such as plastic sheets and gravels do not require frequent replacing, but they will not add any nutrient to the soil.

Granite chippings can be used to pave the walkway of the garden

There are several tips for using mulch. First, keep the mulch at 5 to 7 cm thick. You need to have a certain amount of mulch to protect the soil effectively. However, when the mulch is too thick, it absorbs all the moisture and prevents water from reaching the soil underneath. This is detrimental to the surrounding plants as their roots will not be able to absorb water.

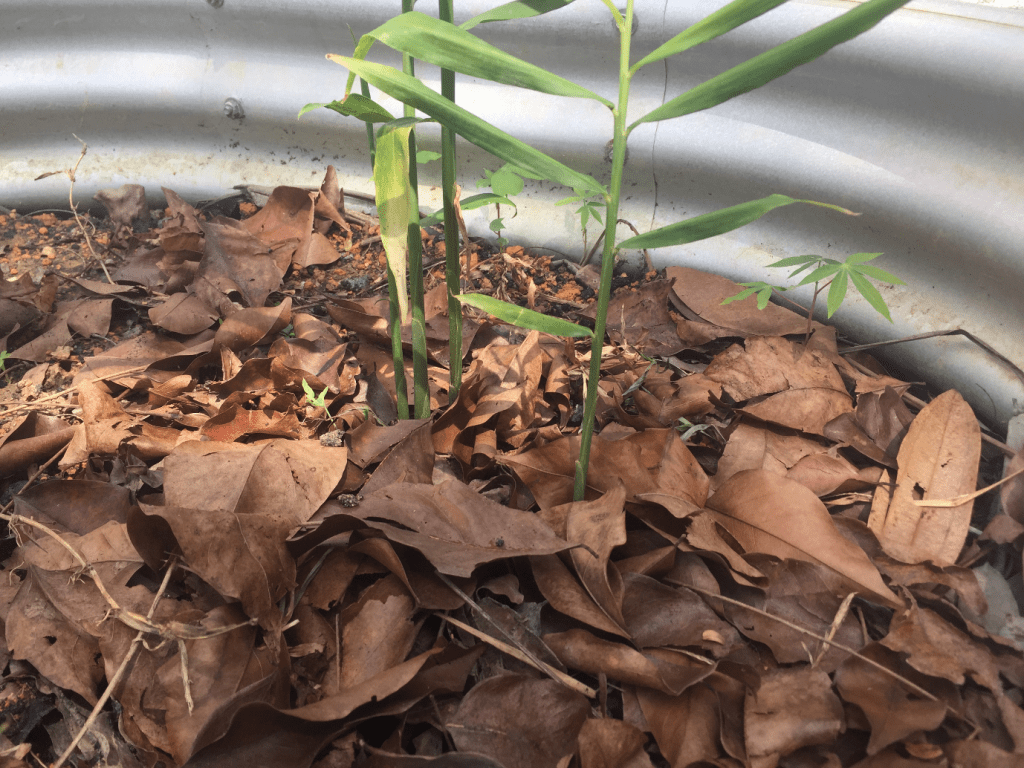
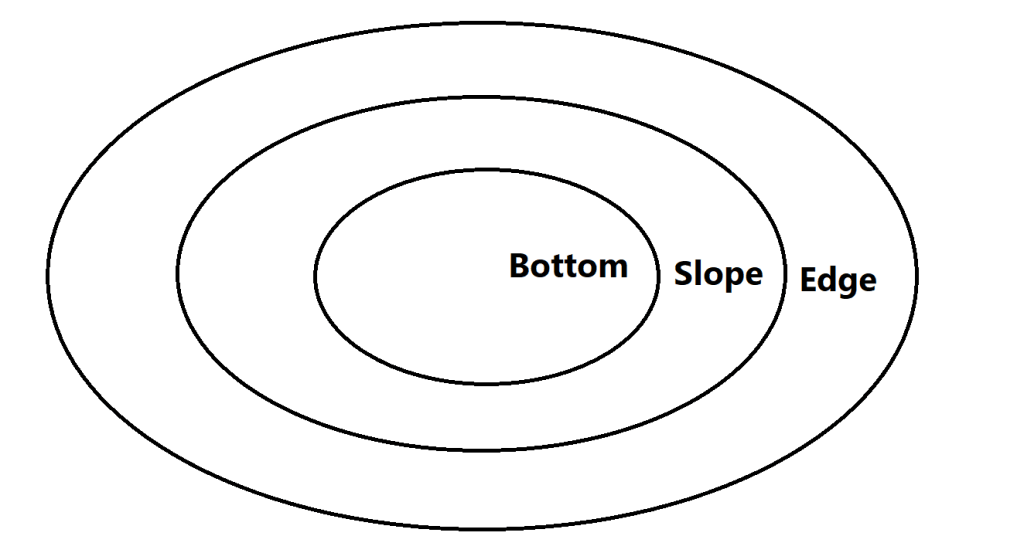
Second, make sure the stem and roots of trees and shrubs are not in direct contact with the mulch. Otherwise, the plants may rot due to high humidity. Also, since mulch creates a moist and dark environment, it may attract pest insects that damage plants. Therefore, try to leave an empty circle, with a radius of 15 cm, around the tree or shrub.

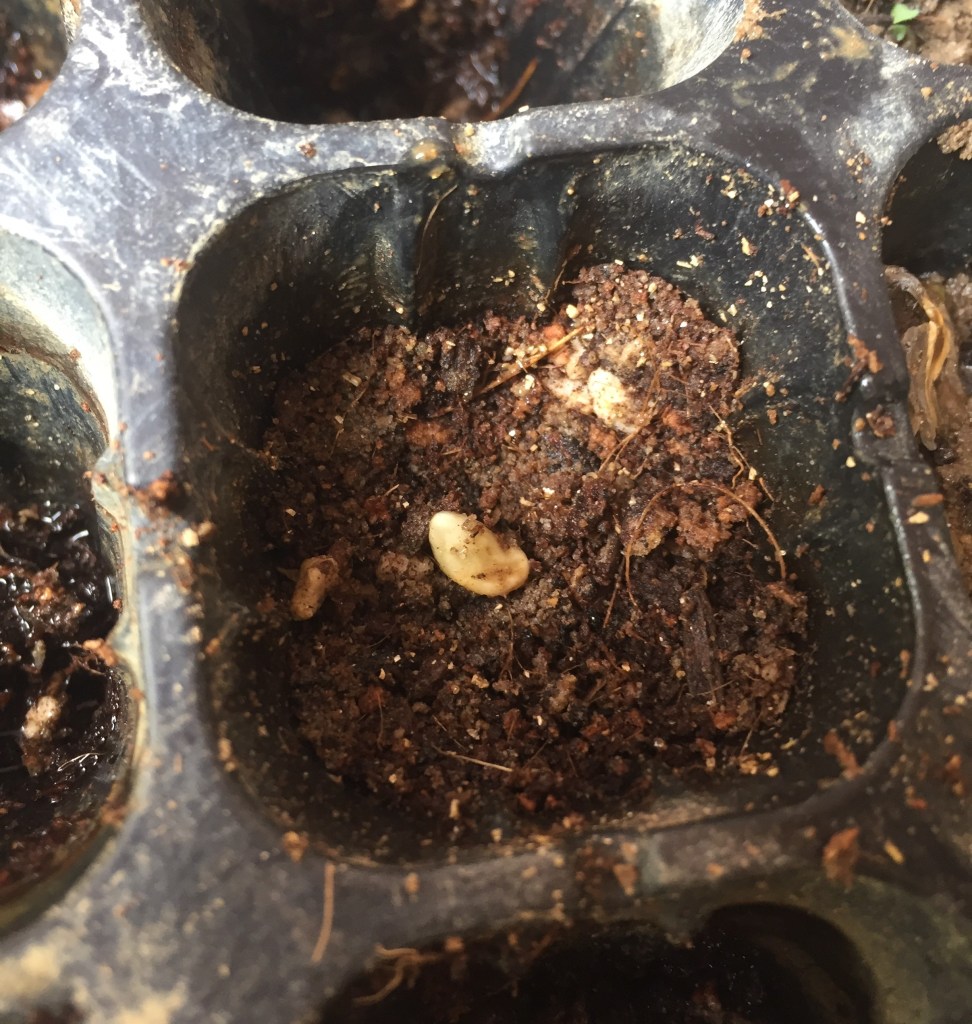
Mulching requires little maintenance. However, if you are using organic mulch, you have to add new mulch consistently as the mulch will eventually disintegrate. Sometimes, weeds may sprout if the mulch contains seeds or the soil was not weeded properly before mulching. Remove the weeds by hand if you spot any of them.

Organic mulch will slowly decompose and disappear.

The mulch may harden as time goes by. You will need to rake and loosen the hardened mulch so that it becomes functional again. If you are using lightweight materials for mulching, create an outer edge or border around the mulch to keep it from spreading by wind or rainwater.

Mulching is a low-cost and effective way to conserve soil. You can experiment with different materials to find the mulch that is most suitable for your garden. Have fun!

Categories
How-to

How to make a rain garden

A nice rain garden surrounded by various plants

A rain garden is a temporary, water holding basin that captures water runoff from walkways, roofs, lawns or other impervious surfaces. It is a sunken area filled with water-absorbing plants and well-drained soils.

The main function of a rain garden is to manage inconsistent rainfall. A rain garden can soak up to 30% more water than a lawn. It helps to recharge groundwater supply, supports wildlife habitats and removes pollutants from water.  

Planning and site selection

Create your rain garden on a slight slope so that it receives water easily. Keep it at least 3 m away from buildings. Try not to position the garden over septic systems and under trees as these places are easily damaged by high soil moisture. Avoid filled areas, steep slopes or sites with very sandy soils.

Design the garden with its longest end perpendicular to the slope to maximise the border that intercepts water runoff. The length of the garden should be twice its width to provide enough space for plants to absorb water. Make sure the outlet of the garden leads into an area that can handle large amounts of water at a time.

Digging a trench that directs water to the main drain. Photo by Siti Syuhada

The size of the garden depends on the size of the impervious surface draining into it. It should be 20% to 30% the size of the impervious surface. The deeper the basin and the greater the draining capacity of the soil, the greater the volume of water that a rain garden can accommodate.

Digging

A rain garden is usually 10-20 cm deep, depending on the soil type, slope and size of the garden. Make sure the garden bed is level to avoid water pooling on one side. A well-designed garden will drain within 12 to 48 hours. This ensures the health of the plants and prevents mosquito breeding.

Replace heavy soil with a fast-draining mixture that consists of one-half sand, one-quarter compost and one-quarter topsoil.

A brownish puddle after rainfall. Photo by Siti Syuhada

Pile stones and extra soil on the downhill side of the garden to act as a berm (raised edge) and create a bowl where water can pool to a depth of about 15 cm.

If water does not naturally flow to your rain garden, dig a trench, 7-10cm deep, from your downpipe to the garden. Line the trench with landscape fabric and cover it with stones to create a streambed effect.

Planting

Interestingly, a rain garden is not meant to be a place for wetland plants. Instead, you should grow plants that tolerate temporary flooding and drought, since water will come and go. Choose some hardy, preferably native, plants that require little maintenance.

Try to have a variety of plants with different forms and sizes. Trees and large shrubs deflect and slow rainwater flow. Tall grasses filter out impurities, suck up water and prevent silt from entering ponds or rivers. Short, deep-rooted plants maintain soil structure and direct water into the ground.

Generally, rain gardens have three planting zones that are characterised by soil moisture. Select plants for each zone according to their water needs.

Planting zones of a rain garden

Bottom: plants that tolerate wet conditions

Slope: plants that tolerate occasional standing water

Edge: plants that prefer drier soils

Maintenance

Mulch the garden with compost or shredded bark. Mulching helps to prevent erosion, conserve moisture and suppress weeds. If the water that flows into the garden washes out the mulch, place one or two rocks to break up the flow.

Water new plants regularly, including the drought-tolerant ones. This will encourage deep roots that absorb water more efficiently.

Weed the garden to allow the selected plants to get established. Prune plants that overgrow to keep the inlet and outlet clear of obstructions. Introduce groundcovers and decorative rocks to prevent soil erosion.

Asiatic pennywort is a good groundcover as it can withstand flooding. Photo by Siti Syuhada

References:

Myers, M. (2013, December 12). Plant a Rain Garden. Retrieved from Birds and Blooms Web site: https://www.birdsandblooms.com/gardening/flower-gardening/plant-rain-garden/

Pitcher, J. C. (2008). Rain Garden. Seattle. Retrieved from https://s3.wp.wsu.edu/uploads/sites/2102/2016/03/Rain-Garden_LowRes_Page_2.jpg

Sweetser, R. (2020, July 26). Create a Rain Garden: Two Designs and Plant List . Retrieved from The Old Farmer’s Almanac Web site: https://www.almanac.com/content/rain-gardens-two-designs-and-plant-list

Categories
How-to Uncategorized

How to germinate fruit trees

Seedlings of limau nipis (Citrus aurantifolia)

Growing fruit trees from seeds is an adventurous and fulfilling experience. However, it requires knowledge, skills and hard work. Not all seeds successfully grow into trees. Seed germination succeeds only when there is a correct amount of light, temperature, moisture and aeration. Extra care should be given so that the plants can go through one of the critical stages of their life.  

Seed selection

Choose seeds of plants that are adapted to tropical climates.

It is difficult for fruits like apples and strawberries to survive in the lowlands of Malaysia as they need cold weather to grow and fruit normally. You can start with common plants such as papaya and citrus. Or, you can try growing some exclusive, local candidates such as starfruit, cempedak and mangosteen.

Preparation

Before sowing the seeds, prepare a shady, sheltered environment. Get a seed tray or seed bed ready.

The depth of the seed tray is preferably about 10 to 12 cm (minimum 6 cm; maximum 15 cm). Make sure the seed bed is free from weeds and has good drainage.

A reusable seed tray with 72 individual slots

Mix up a germination medium for the plants.

A good germination medium is well-aerated, moist, loose and yet firm enough to support the young seedlings. Generally, use course, washed sand (to encourage aeration and drainage) and organic matter (for moisture, soil texture and nutrients). Common materials such as weathered sawdust, coconut fibre, loamy forest top-soil and compost can also be used. Avoid adding weed seeds or pests into the germination medium. Remove stones and gravels if there are any.

Cocopeat, the long fibre extracted from coconut husks, can be used as one of the materials of the germination medium

Put the germination medium into the seed tray. Pat it down gently so that the surface is smooth and even. The thickness of germination medium is 1-2 cm, depending on size of the seeds. Smaller seeds need thinner medium. Leave enough space above the medium in seed trays to cover the seeds and permit watering. If seed bed is used, add 5-10 cm of germination medium on top of it. Gently rake the medium to level it.

Fill the slot with germination medium.
Gently press the slot content to make it even.

Sowing

For smaller seeds, scatter them evenly over the surface of germination medium. For seeds that are large enough to pick up, sow the seeds individually and space them out at 2-3 times their diameter.

Place the seed on the germination medium

Cover the seeds with more germination medium or a mixture of coarse sand and fine gravel (2-4mm diameter).

Do not cover seeds with fine soil particles or lumps of earth as the former impedes drainage while the later restricts emergence of young shoots. The thickness of covering depends on seed size:

Seeds less than 2 mm diameter: just enough to cover them;

Seeds 2–5 mm across: cover with about 4 mm;

Seeds larger than 5 mm: use about the same depth as the seed diameter.

There are some seeds that require light to germinate. In such cases, the covering should be thin enough to allow light penetration.

Cover the seed with germination medium.

Watering

If the germination medium is moist enough and the seeds contain enough water for germination, do not water the seeds immediately. Sprinkle the seeds with fine droplets if watering is needed.

Cover the seed tray with transparent plastic sheet to slow down drying. However, check the seeds regularly and remove the sheet as soon as the shoots emerge.    

Keep the germination medium moist but not too wet.

Signs of good germination

The seeds germinate well if the seedlings pop up. Emerging seedlings often have their shoots bent over like a hook. The shoots then straighten out in the light.

The sprouts emerge and receive sunlight.

Seed leaves either remain below ground or emerge and turn green. The first foliage leaves of seedlings usually look different from the leaves produced later. Therefore, be careful not to remove them when weeding.

Categories
How-to

How to create a log pile

Rotting wood provides food and shelter for many animals.

Log pile replicates a forest floor ecosystem. It creates the cool, moist and shady conditions for many ground-dwelling animals such as insects, snails and centipedes. If the log pile is close to a pond or a stream, it also attracts water-loving creatures such as frogs and toads.

Aside from being a shelter, log pile also provides food for animals. The dead, woody materials are food source of decomposers such as termites and fungi. Larger predatory animals such as birds feed on insects that live inside the log pile.

Choose a quiet, undisturbed part of the garden to create a log pile. It can be a corner of garden or back of a border. Make sure the log pile receives enough shade and moisture.

Dig out a sunken space to bury the logs. You can start by placing some upright logs under the soil. Also, pave the base with dry leaves as they create comfortable hiding places for animals such as frogs.

Dig a shallow hole to place the logs
Dry leaves help to regulate humidity of log pile

Next, stack large logs towards the center, with smaller ones and tree branches on top and around sides. Try to have at least 3 to 4 layers of logs. Add some leaf litter, dry grasses or soil to facilitate the formation of microhabitat.

The multi-layered log pile

It is up to you whether to stack the logs up neatly or randomly. Try to leave gaps of different sizes between the logs so that animals can find ideal spaces to rest or lay eggs.

Animals will live in the gaps between the logs.

After the log pile is established, leave it and make observation from time to time. You can water the log pile if it looks dry. Try to avoid human intervention so that decomposition and other natural processes can take place.

Continue adding logs to the log pile as the wood gradually rots down. That way you will have a range of wood types, from fresh, denser wood at the top to brittle, partially decomposed wood towards the bottom. Use natural, unprocessed wood. It is best to use logs from native species.

Categories
How-to

How to make fertile soil

Written by Goh Shang Ming

From sowing seeds to pulling weeds, gardening is extremely beneficial to our health and wellbeing. As gardening is an everyday activity, this unique form of regular exercise helps keep us fit and healthy. Moreover, research shows that getting your hands dirty in the garden can increase your serotonin levels. To simply put it, soil contains a natural antidepressant that can make us happy. Undoubtedly, gardening can bring joy and fulfilment to your life.

Before you spring into action, you must first ensure your garden bed is healthy or in other words, fertile.

Soil is the foundation of your garden as it stores and provides essential nutrients, water and air to support plant growth.

Thus, planting in a garden with infertile soil would result in disappointment, putting your efforts in vain as soil of low quality is incapable of sustaining plant growth. An easy sign to look out for in identifying healthy soil is the presence of underground animal activity, specifically earthworms. The presence of these little creatures indicate a healthy soil system. Additionally, soil that is rich in organic matter tends to be dark brown or black in colour. However, if the soil that you are working with has little to no life in it and looks more like dirt, fret not! Here are some tips on how to make fertile soil.

Earthworm is an ecosystem engineer which modifies soil structure

Before making fertile soil, we must first understand what makes an ideal rooting environment. Roots are described as the lifeline of a plant, not only do they anchor the plant in place, resisting the forces of nature and other environmental stresses, they too play an important role in the uptake of nutrients. With that being said, soil requires a balanced combination of water, air and nutrients to become a rich growing environment. Soils of high quality would promote the growth of a strong root structure, keeping the plant above nice and sturdy. 

First off, add 2 to 3 inches of compost to the top 6 inches of the soil. Compost, sometimes referred to as “black gold” by gardeners, is decomposed organic material containing basic nutrients needed by plants for growth. Some examples of compostable material include leaves, grass clippings, and even plant-based food scraps such as fruit and vegetable peelings, coffee grounds and bread. The addition of compost also keeps the soil at a light and fluffy texture, helping it retains its moisture. 

Learn how to make compost here: How to make compost

We can make use of food waste to make compost

Maintaining the right consistency of soil is a critical part of your gardening success. Avoid compacting soil with heavy equipment as well as stepping directly in the growing beds. If your soil is compacted, it would be difficult for water and air to move freely through the pore spaces to the roots. On the other hand, if your soil is too loose, it cannot hold water, ultimately drying out your plants. By adding compost to your soil, not only does it adds organic matter, it too helps maintain the ideal soil consistency. 

Final tip in making fertile soil is to mulch your garden. Mulching is the process of covering the open surface of the ground using mulch, for example – shredded bark, animal manure, stones, etc. Mulches can either be organic or inorganic. The mulch applied on the top layer of the soil helps retain moisture in soil by trapping surface water of the soil that would otherwise get evaporated quickly. Furthermore, weeds are also suppressed in the process as the mulch blocks and prevents sunlight from reaching them, minimising competition with the plant. If organic mulch such as decaying leaves or bark are used, your soil would be further enriched with nutrients and organic matter, boosting its fertility.

Mulch helps to retain moisture and regulate soil temperature

 Starting your own garden may seem like an immense responsibility. However, once the flowers blossom and produce ready to harvest, it will be truly rewarding not only for you but for our planet.

Categories
How-to

4 easy steps to make your garden snake-friendly

Written by Syuhada Sapno
Photos by Syuhada Sapno

Mind you, this guide is suitable for Malaysian cities where we have lesser population of venomous snakes as compared to other countries worldwide.

Snakes are tertiary consumers, which means they are predators that feed on smaller animals like insects, rodents, and birds. They would make a great gardener. About half of common snakes found in Malaysian cities, at least in Kuala Lumpur, are non-venomous snakes. Even the venomous Sumatran spitting cobra (Naja sumatrana) would warn you by expanding its hood out as a sign for you to back away. If they’re continued to be provoked by you E.g. Trying to jab them with a stick then they will strike. Cobras have manners too.

Monocled cobra (Naja kaouthia) with its hood closed

Unless provoked, snakes are totally not dangerous. They are harmless and are more afraid of us than we are of them. Non-venomous snakes will be more likely to slither away, unless it’s a giant reticulated python. They are a little slower. 

So put your penyapu down from shoo-ing them away and let them save some of your energy in managing your yard. A great way to welcome snakes to your garden is to create a space for them to visit, feed, and/or even live with you.

Making your garden snake-friendly.

The target is to allow them to help tend your garden by feeding on animals like rodents, lizards, skinks, frogs, and small birds. Kinda like making your garden a cafe. Here are some of the things you can do for your legless gardeners:

1. Increase biodiversity in your garden

Increasing the diversity of plants, this will attract a variety of wildlife in your garden. By doing so it encourages a more balanced ecosystem ranging from plants as producers, to its primary consumers like grasshoppers, to secondary consumers like frogs and geckos, and finally to tertiary consumers like our dearest snakes and raptors. Besides that, this also provides a corridor for snakes to move around. Here is a generalized list of some common urban snakes and what it feeds on: 

Common snakes in Kuala LumpurFavoured prey of snakes
Common wolf snake (Lycodon capucinus)House geckos, lizards, skinks
Reticulated python (Malayopython reticulatus)Rats, birds, civet, primates
*Sumatran spitting cobra (Naja sumatrana)Rodents, frogs, other snakes, lizards
Painted bronzeback (Dendrelaphis pictus)Lizards and frogs
**Oriental vine snake (Ahaetulla prasina)Lizards and frogs
**Paradise tree snake (Chrysopelea paradisi)Lizards and bats
*Venomous
**Mildly venomous

2. Provide a refuge area or microhabitat

The simplest way to describe a microhabitat is a habitat but smaller in spatial extent. Some species are active in daytime, while others are active at night. Habitats favoured by snakes are like dark crevices of trees, abandoned buildings, drains, and cooling environment like piles of logs, metals, and walls. Build up some rock piles, logs, metal sheets or plywoods. These are suitable places for snakes to get shelter as it is a dark and cool spot for them to rest. 

Stacked metals with dark and cooling crevices

3. Give snakes some signs

Give snakes some signs before starting any activities in your garden like mowing, pruning, or moving things around. As a reptile, snakes need to regulate their body temperature externally. During mid-day, they will be out to bask. They are also capable of detecting vibrations and ‘smell’ with their tongue. So make some noises like clapping your hands, stomping the ground, or use a stick to knock your raised beds, metal piles or wall. These acts will trigger snakes and they will slither away. This practice will allow you to have predators to control populations of frogs and other small animals and co-exist with snakes. 

4. Step aside, pesticides!

Let’s face the fact that purchasing chemical pesticides to deter pests in your garden is a waste of time, money and energy. No matter how much chemicals are sprinkled around the garden, as long as it provides a good source of food for some animals they will always come back. Although targeted pesticides are not aimed for snakes E.g. slug baits, snakes feed on these animals. Hence, indirectly ingesting the pesticide. 

Take this gardening opportunity to co-exist with the remaining nature striving in your backyard. Just remember, snakes barely even bother about a person unless they feel threatened. Here is a meme I made to conclude this guide:

Fun fact As snakes grow, they shed their skin. This process is known as ecdysis. One of the reasons why they do this is to get rid of parasites. 

References: 

Dhanhyaa. (2019, August 27). Venomous or Not? Here’s a Handy List of Snakes Commonly Found in Malaysian Houses. Cilisos. Retrieved from https://cilisos.my/venomous-or-not-heres-a-handy-list-of-snakes-commonly-found-in-malaysian-houses/

Dawe, J. (2017, June 19). These 3 Snakes are your Garden’s Best Friends. Eartheasy. Retrieved from https://learn.eartheasy.com/articles/these-3-snakes-are-your-gardens-best-friends/

Ecology Asia https://www.ecologyasia.com/verts/snakes.htm

Categories
How-to

How to Make Compost

Written by Ethlyn Koh
Photos by Syuhada Sapno

We are often hit with pangs of guilt when we dispose leftovers or other perishables that have been left sitting at the back of the refrigerator forgotten, overlooked or uneaten. 

According to the United Nations Food and Agriculture Association (FAO), an estimated 1.6 billion tonnes of food (worth $750 billion annually!) is wasted globally each year. In Malaysia alone, up to 16,688 tonnes of food waste is generated on a daily basis, an amount sufficient to feed 2.2 million mouths three meals a day.

The amount of food wasted globally would help feed twice the number of malnourished people across the globe, ending world hunger. 

However, wasting food not only comes with a financial and ethical cost, it too has impacts on the environment. Food wasted is equivalent to wasting all the energy and water invested into producing and processing, transporting, and packaging it, all the way until it reaches our plates. And if discarded food waste ends up in landfills to rot, a potent greenhouse gas 25 times more efficient at trapping heat than carbon dioxide known as methane would be released. Undeniably, reducing food waste can reduce our carbon footprint, reversing global warming. 

So what can we do about it?

A potential solution to minimise food waste ending up in landfills is composting. Composting is a method used to decompose organic solid wastes into simpler compounds with the help of microorganisms in the presence of air. The rotted organic material also known as compost, could be used to improve the quality of garden soil or even as a fertilizer for plants, reducing the need for chemical fertilizers. 

To begin, you require three simple ingredients – greens, browns and water

Greens refer to materials that are nitrogen-rich, crucial for microbial growth. Some examples include fruit and vegetable peelings, coffee grounds or filters, tea bags, and grass clippings.

Browns represent carbon-rich materials which provide aeration such as dry leaves, shredded paper or cardboard, egg boxes and egg shells.

Water keeps the compost pile moist, important for compost development.

When selecting your food scraps, avoid meat and dairy products which include fish bones, milk, yogurt, as well as oils and butter. These foods would cause bad odours to waft out of your compost, consequently attracting pests such as rodents and flies. Pet wastes (e.g. dog or cat faeces) and diseased plants should also be left out of the compost pile or bin to prevent the transfer of harmful pathogens back to plants or to humans. If you would like to compost these materials, you might want to look into the bokashi method.

Once you have collected and stored a good amount of kitchen and garden scraps, it is time to make the compost mix. Into your compost pile or bin, start layering your browns and greens. 

As green materials are typically wet and brown materials tend to be dry, you should always start the bottom layer with dry browns followed by a layer of wet greens, then just repeat the layering process until you run out of food scraps.

Step 1: Rake some dried leaves and add it to your bin
Step 2: Tear or shred your newspapers and egg cartons into smaller pieces
Step 3: Add some coffee grinds or tea bags
Step 4: Throw in your fruit peels like bananas, oranges, papayas, and the middle part of an apple that nobody eats
BONUS! Cutting up your fruit peels into smaller pieces helps to increase the break down process

Step 5: Repeat step 1-4. It is all about layering! The ratio should approximately be two or three portions of browns to one portion of greens (3:1)

Add a splash water to the browns to keep the compost mix nice and moist. Do not add too much water until the pile gets wet and soggy. If your compost is too wet, the sludgy mixture would not breakdown and will produce a foul odour. However, if it is too dry, microorganisms cannot decompose the materials effectively. Ideally, your compost needs to be moist for effective composting to occur. 

Step 6: Add a splash of water

Once you are done, just sit back, relax and let the magic happen. In our Malaysian climate, the decomposition process usually takes anywhere between 4-6 months, depending on the temperature within your compost pile. The higher the temperature, the quicker your ‘black gold’ is produced. It is advisable to turn or rotate your compost pile using a spade or stick, preferably once a week to ensure everything is well aerated. 

So how do you know when your compost is ready? 

Finished compost tends to be dark and rich in colour, smells earthy (sometimes with a hint sweet or sour smell), and fluffy to the touch with a good moisture content just like a sponge. That is when you know it is good to go. If your compost smells like a dumpster or just bad in general, it might be too wet and have yet to decompose. Fret not, add more browns to soak up excess water or readjust the portions of browns to greens.

Composting is pretty experimental, so keep trying and don’t give up!

Categories
How-to

A Beginner Butterfly Garden

A beginner’s butterfly garden uses host plants and flowering plants that grow wild. Shade is not an issue for many of these butterfly species here since they are adapted to living in hot open areas. Because this garden uses wild plants, it requires almost zero maintenance (except for occasional trimming).

For aesthetic value, you can hide the host plants behind or between ornamental plants, or use them as verges (edge or border plants).

Some of these butterfly species may already be present in your gardens. But enriching your garden for butterflies can bring them closer for you to view.

Target butterflies

This garden is suitable for sustaining populations of these species of butterfly.

Passionflower butterflies

These are recent introductions to Malaysia; they can use passionflower vines as a food source for their caterpillars

Coromandel and Cleome butterflies

These butterflies have a variety of host plants but they can use coromandel and cleome as host plants.

Lawn butterflies

These butterflies lay their eggs in lawns on low growing plants that can withstand being mowed.

Roadside tree butterflies

These butterflies can use common roadside trees as a host. This means that you don’t have to plant their host plants but they will still be attracted to your garden.

Host plants

Common four rings use grass as a host plant. A pesticide free lawn is enough to sustain these butterflies

This is the list of host plants that can be planted in a beginner butterfly garden. You can choose to plant all or just some of them. A few of these are common urban wildflowers.

Passionflowers are creeping vines that can be grown on fences. Sometimes they can be found growing on the borders of drains or other plants.

Coromandel and Cleome are two easily grown wildflowers that are almost everywhere and require almost no maintenance. They grow low and won’t take over your garden, so a small patch or planting them between pots is possible. Both these plants produce seed pods that can be easily harvested from patches of wildflowers.

Lawn plants like grasses and some plants that grow together with grasses, such as Semalu and Desmodium, are also used by lawn butterflies.

Target butterfliesHost plant species
Passionflower butterfliesCorky passionflower, Passiflora suberosa
(other ornamental passionflowers can also be used as long as you don’t mind caterpillars)
Coromandel and Cleome butterfliesCoromandel, Asystasia gangetica (ornamental varieties are available if you would like to use them instead)
Purple Cleome, Cleome rutidosperma
Lawn butterfliesSemalu, Mimosa pudica
Desmodium
Goat grass, Ishaemum muticum
Roadside tree butterfliesAcacia
Raintrees, Albizia
Cassia
Desmodium is a host plant for the Tiny Grass Blue butterfly. It also enhances soil fertility and can grow in between grass in a lawn.

As with wildflower patches, allowing other plants to grow in between the host plants helps to fertilise the soil and lower the need for maintenance. Let it grow wild without pesticides and you might get additional biodiversity such as stingless bees and ladybugs.

Flowering plants

Little ironweeds can survive in degraded land and are very attractive to pollinators

Coromandel flowers can double as a nectar source for adult butterflies. Easily grown wildflowers such as Goat weed, Cupid’s shaving brush, Tridax daisy and Beggarticks are suitable sources of nectar since they are almost always flowering.  Since all of these are from the sunflower family, they produce dandelion like seeds that reseed the plot after the wilt.

The seeds can be harvested from wild patches and placed in a plot.

Tridax daisies are hardy plants that are used by a wide variety of pollinators

This article is supported by The Habitat Foundation Conservation Grant

Categories
How-to

How to start a wildflower garden

The simplest method is to not do anything and let a patch regrow with wild plants. You can remove any unwanted or dangerous plants through weeding, but there is not much maintenance involved with these patches. A wildflower patch that needs to be tended by humans is an oxymoron.

If you want a bit more control over which wildflowers grow in your patch. You can harvest seeds from existing patches of wildflowers and scatter them into your plot. Wildflowers from the dandelion family (Asteraceaa) have dandelion like seeds that you can blow into your patch. Others have small seeds, fruit or pods that you can harvest when the turn mature and brown. Just break the pods and release the seeds onto the surface of your patch.

Transplanting wildflowers is a bit risky since they wilt very fast. Try to not expose the roots of the plants and collect it with its surrounding soil.  Make sure that your patch is moist and watered regularly during the first few days to ensure that your plants don’t dry out. Some wildflowers grow by runners and can be planted similar to transplanting.

Not all your flowers might survive, but that’s perfectly fine. All plants require the correct amount of shade and the correct soil type. In other cases some of your plants will be outcompeted by other wildflowers or eaten by herbivores. These are all good learning opportunities to understand the ecology of these flowers better.

Try to allow a mix of different wildflower species to grow in your patch. This will make it more resilient and beneficial to the soil, as well as more useful to wildlife that forage for food in the patch.


This article is supported by The Habitat Foundation Conservation Grant